Sorry, but you are going to have to spend some cash
If you are going to record your own books into audiobook form, you must do it properly. Despite some people saying you can simply record on your phone, this will produce an inferior product that annoys and infuriates listeners who are used to professionally recorded books.
Audiobook Menu
FAQs:
Reading Your Book
Recording Your Book
Editing Your Recording
Technical Questions
Recording your own poetry
Other Articles:
A General Guide
Recording Dirt
Recording My Poetry
Preparing Your Manuscript
Plan your audiobook as you write
Using iZotope RX 6 with Cubase
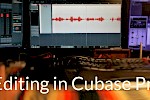
Editing in Cubase demonstration
A bit on Punch & Roll
Should you delete breaths?
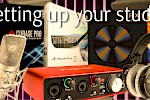
Setting up your Studio
External Articles & Resources
Punch and Roll
I am not going through all possible buying choices here, you will need to do your own research, but this will hopefully give you a good starting point.
There are four areas that you have to look at:
- A soundproofed and acoustically treated space to record in
- Hardware - Microphone, headphones and speakers,
- An audio interface (your computer sound card is not good enough)
- Software to record and edit your voice.
The only part of this that can be free is the software, everything else will cost you cash!
A Voice Booth
There are a huge number of options available here, both as self-build and bought in solutions, but all are trying to achieve the same thing; a space that has good acoustics and that is isolated from outside sounds, whether that is a low-flying cow, next door's kid on her scooter or the annoying hum of your computer.
Firstly, there is a big difference between acoustic treatment and soundproofing.
Soundproofing prevents sound breaking through and is achieved in two ways:
- Dense materials like concrete, bricks, or thick dense rubber to absorb sound waves,
- Material and techniques that reduce the transmission of vibrations.
What you are aiming for is a noise floor of at least -60db - that is pretty quiet, all told, and if you are doing a lot of this, and can get it lower, better still.
Acoustic treatment is a different beast. When you make a noise in a room, like talking, that sound is transmitted through the air in sound waves in a very similar way that waves travel through a bowl of water when you drop something in it. Those sound waves will eventually hit something like a wall. Acoustic design and treatment is all about what happens to those waves next.
For instance, if your walls are tiled with nice shiny ceramic tiles and the walls are parallel to each other, the sound waves will bounce back and forth for ages. You have just built yourself an echo chamber, and that is the last thing you need for recording an audiobook!
There are two things you can do to go in the other direction; to reduce reflections.
Firstly, and most obviously, you can do something to reduce the quantity of reflections, even change their nature. The quickest way to do this is to soften the hard surfaces by adding blankets, cushions, acoustic foam and so on. Note that none of these materials will soundproof your space.
The second thing you can do is change the direction of the reflections. If you have two walls parallel to each other, any sound can bounce between the two compounding the problem. If you think about this, this more or less describes any room in any normal house. If you think of a well-built cinema, none of the walls are parallel. This reduces the effect of the bouncing waves by making sure they cannot bounce back and forth like your reflection between two parallel mirrors.
Some frequencies are more of a problem than others. Low frequencies, bass frequencies, can be a particular problem. These frequencies are handled with units called Bass Traps. Simply put, these are shapes of particularly thick acoustic foam that are aimed at these low frequencies. In music studios and very large spaces, foam is not enough and we build boxes into the walls and the corners. These allow the sound to enter but are shaped so it cannot easily bounce out again - it gets trapped. In a small space for voices, the sound won't have as much energy and thick foam in the corners of the room will be enough.
Do I need to build my own booth?
In an ideal world, yes. Building or buying a booth (bloody expensive) will certainly solve all your problems in one go, but if you do not have a huge problem with outside sound, you can probably get away with something pretty basic. Some people set themselves up under the stairs, or in a storage room, or build something fairly lightweight then lag it with plenty of old bedding. This can work very well indeed and though it might look a mess, it can sound pretty good!
Often the biggest problem is the computer itself. Some are very quiet, but even the quiet ones can make a surprising amount of noise and often at frequencies that are annoying. In my case, my computer is not in my booth and I have a remote controller for my system. But some people put it outside, then simply run cables for the monitor and keyboard into the booth.
However you solve your acoustic problems, although it can take up a fair amount of space and need some work, it can be done without a huge budget.
The Microphone
This is one area where there is no cheap solution, though it does not need to cost a fortune.
If you really don't have money woes, then go for a Neumann U87 mic. These are pretty much the gold standard in voice mics and are what we had in all our studios. They last for years too - some of ours were twenty or more years old. But there is a problem with them - a new one will cost you around two thousand pounds or more!
Thankfully, Neumann do a cheaper large diaphragm mic called a TLM 103 that kicks in around a thousand and is still very, very good.
Both these mics are condenser mics that require phantom powering, and I will get onto that in a moment.
The point about a condenser mic is that the diaphragm, the bit that is moved by the sound waves, is very light and fragile, making it very sensitive and accurate. This is why they are preferred over dynamic mics which are better suited for stage and other uses where you need something more rugged and are happy to compromise on accuracy.
There are other makes of condenser mics that are cheaper than a Neumann like those made by Rode, and you should investigate these if your budget is tighter. I have never used them, so I am not going to make an opinion here, but I did listen to one very cheap one that a friend bought as part of one of these complete podcast kits - it sounded horrible! So, be wary and ask lots of advice.
Audio Interface / Mic Pre-Amp
The next part of the process is to get the electrical output of the mic into your computer. This is a two-stage process.
- A mic pre-amp that powers the mic and converts the voltage from the mic to Line Level required from then on
- A digital interface that takes the analogue signal from the pre-amp and feeds it into the computer for storage/recording.
Although in studios this is often still two different devices as the sound engineers want to use their beloved pre-amps in their recording desks or racks, thankfully for you, good quality audio interfaces have built-in pre-amps!
These normally include phantom powering to power the mics - Pro condenser mics need 48v.
(As a note, it is called phantom powering because of the clever way it works. The power, a DC voltage, is sent up the same wire that carries the audio signal. It sends 48v up and -48v down so that across the pins the potential difference is zero. Consequently, you can plug in a mic that doesn't require phantom power or less voltage without frying it. It is called phantom because there is no obvious power supply or separate connection - it is a phantom!)
There is a plethora of interfaces out there. I have an ageing Focusrite Saffire Pro 40 which has served me very well. It has good mic pre-amps and works very well with my system. But it is overkill if you are just plugging in one mic - mine has a huge number of inputs and outputs!
What you are looking for is an interface that has good pre-amps, is very, very quiet (no added electrical noise to the signal path), has proper headphone outputs and can be configured to work with a digital audio workstation using ASIO drivers if on Windows.
(Note: ASIO - Audio Stream input/output - is a driver protocol that bypasses the normal layers of the Windows system to create a direct connection between the DAW and the Sound Interface. Macs use a different system that does the same thing called Core Audio, I think - I am not a Mac user).
Interfaces start at around £100 or so for a very simple 2-channel affair and this is probably all you need. The Focusrite Scarlette range plugs in via USB and is very well recommended, but there is a lot out there!
The Digital Audio Workstation (DAW)
All of the above is a bit pointless if you do not have something to record on and this is where the DAW comes into play.
I am assuming here that you have a computer of some sort, either a Mac or Windows machine, desktop or laptop. As a general note, you do need a computer of reasonable power but not dramatic. I would suggest that 8gb of ram is ideal and of course, if you are going to do lots of recording, you need plenty of hard disc space. Personally, I prefer editing on a desktop with nice big monitors, but remember that desktops are noisier than laptops. You can also record onto a tablet, but editing is more fiddly and you can run into problems with space. I have an iPad Pro with Cubasis installed and an IK interface. That works pretty well, but I would still transfer to my desktop for fast editing - more about that coming up.
There are a lot of DAWs out there at a variety of prices and abilities. Some are free like Audacity, an open-source solution that has been around for years. I use Cubase because I am also a composer. Although this is perfect for audiobooks, it is also overkill and expensive at nearly £500. The cutdown Artist version is half the price which is better, but you maybe better off with something like Studio One which has a free entry-level version with an easy upgrade path.
I am not experienced with DAWs outside of Cubase, Nuendo and Pro-Tools, but there is a lot of advice out there.
However, there are certain aspects about a DAW that I would suggest you look for in your choice. By the way, this list pushes Audacity out of contention.
Multitrack
Although a book recording only uses one mic and you would think that multitrack is only useful for music, in fact, this is very useful. Recording each chapter on a separate track allows you to instantly compare what you are doing now to what you did yesterday, it allows consistency in mastering because all tracks are being mastered through the identical set of settings and so on.
Non-Destructive Recording
This is related to the way multitrack DAWs work. Each time you press record a new file is created in the background, creating a new block of audio on the timeline, visually speaking. If you record on top of one block, the original block is not erased but just overlayed, like using layers in a graphics program. In consequence, you can still access this older recording when you are editing - trimming the place you went into record, perhaps, or using the original breath, or whatever. Basically, it gives you much more versatility and I think of it as a must. No professional studio that I know would work destructively in digital - that was something we happily left behind from the old analogue days.
Punch-in Capability
Punching in is a method of recording where when you make a mistake, you wind back a short distance, play back the recording and then punch into record at the point of the mistake to correct the problem. This can be done either manually (which is how I work), or programmatically by marking a punch in point and letting the DAW to the actual punching in.
This is a very popular way of working because it reduces the amount of editing needed later (you are not having to wade through multiple pick-ups) and when you start to speak, you are reacting to what went before, which improves the performance.
Good key commands
Using key commands and macros when editing speeds up the editing process hugely and makes it a much more pleasant chore. There will never be a situation when you don't have to edit (unless you employ someone to do it for you), so this is part of the workflow, whether you like it or not. Whichever DAW you go for, make sure that it has good editing tools that are fast and easy to use.
Plugins, repair and File Types
Plugins are extra utilities that can be loaded into a DAW that add extra functions.
The most common used in voice production are compressors, limiters, loudness meters, EQs and so on. Good DAWs tend to have these built in, but there are also some excellent third-party offerings out there.
I won't go into what each does in this article, but you should be aware that plugins add to the CPU load of your computer, so the more you use, the better computer you will need. But to be honest, most modern computers should be able to handle what is required for voice work without trouble.
Working in multitrack mode means that things like compression can be added live and not as a process - non-destructive again - which is a whole lot better than processing a file only to find later on you messed up.
From time to time you may need to repair audio problems, things like Pops (or plosives), sibilance, the odd crackle and so on. Sometimes you have no choice but to rerecord the section, but many problems can be solved using a powerful repair tool. I use iZotope's RX 6 both as a plugin and a standalone repair editor. It is expensive, but if you end up doing this as a job, then it may well be a worthwhile investment. It also has a very powerful noise reduction module that can transparently get rid of anything low level that you didn't manage to soundproof out - note, getting it right first is the better way.
You will always master in WAV format, however, when you upload your finished book, you will be asked for either MP3 or FLAC, so you must be able to export or convert to those file types.
Headphones and Speakers
And, of course, you need to be able to listen to everything you do!
Quality is important here. You are producing something for sale, so you must be able to hear what you are doing accurately.
Headphones should be closed back and not open. You do not want sound leaking out and being picked up by the microphone. You cannot get away with cheapo headphones, I am afraid. But neither should you spend outrageous fortunes on some of the trendy over-priced crap out there.
I use Beyerdynamic Custom Studio headphones. Beyerdynamic has been producing industry standard headphones for years. They are not cheap, but they are good. They have a clear, precise sound, are comfortable (seriously important in long sessions) and will last. There are other good makes out there, but you will never really go wrong with these.
Speakers are a bit more problematic. The general recommendation is that you use headphones a lot - not just for recording but for editing so that you hear any little imperfection and can get rid of it.
This is good advice, but to be honest, spending a day under headphones is not only potentially bad for your ears but pretty depressing too.
If your editing environment is not quiet and your speakers not great, then headphones are the way to go. But if you are doing this professionally, then I strongly suggest you sort out your editing room sound-wise and buy a decent set of near-field or mid-field studio monitors with built-in active amps.
But be warned, you might not see much change out of a thousand quid! I use Dynaudio and love them, but I clenched my teeth when I wrote the cheque.
Wiring it all up
In the old days, this was a more important consideration than in today's digital world. Interference is less of a problem than it used to be, but there are still issues and good wiring helps.
In studios which have miles of cable, the studio is normally run off a dedicated power circuit (sometimes on a different phase of the mains) and has its own technical earth - basically a big metal plate buried in the basement of the building. You probably don't want to go that far and you don't need to.
Just make sure that you use good quality, shielded cables on all the analogue components (mic leads, headphone cabling, speaker leads and so on), so they don't pick up any noise. Mic cables from Neummans are balanced. Balanced cables have two signal wires plus the shielding earth. One of the signals is reversed polarity, and when they are combined at the pre-amp, this effectively cancels out any line noise. Clever, huh?
For your speaker cables, you want good, heavy-duty cabling that is very low in resistance. Mains cable (the stuff you use to wire the house) is good for this - cheap too.
And finally...
So, there you go, a bunch of thoughts for you to consider.
The bottom line here is outside of perfecting your speaking voice, you must be sure that the recording and editing process is not only easy and smooth but is good quality. If it is bad, then it will reflect both on the book and on you. People pay for audiobooks; they don't want rubbish quality which is painful to listen to.
There is a cost implication here, there is no way around that. Some savings can be made by either doing it yourself or buying slightly poorer quality gear, but you need to be careful. I have heard some podcasters recommend some very cheap bundles, but when I have heard the final output, well, I wouldn't want to use it to record an audiobook. Podcasting can get away with dodgy quality sometimes - audiobooks cannot.
You will also have to learn some technical bits and pieces. Some voice-overs have had engineers install their gear and help them set it up, and this is not a bad idea at all. But in the process, you should learn what is going on. If you are the one pressing the buttons, you should have some idea what to do when nothing happens. Most of the time it will be something very stupid (like you forgot to plug the mic in), but you need to know the process so at least you can eliminate the blindingly obvious and understand what it was that the tech head just told you over the phone.
Good luck!