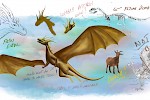
Geography is the bedrock of civilisation
Your Working Map
I am using Illustrator CC(2014) here, but most of the principles apply to any graphics program.
Working with vector graphics allows everything to scale without distortion so the same map can be used for very broad map work and can be used for detail by zooming in.
Grids
This is probably the most important tool in all your mapping; as I said earlier, getting the distances believable between geological and geographical features will influence the telling of your tale and the workability of your plot.
A grid will give you a constant measure while you are designing. Currently I am working in leagues so the major lines of my grid are 10 leagues apart and the minor lines are one league, but you can set this up how you wish. Initially you will need to change a couple of settings - decide how often you want a gridline and also make sure that the grid is on top of the artwork, not buried underneath.

Go to Edit > Preferences > Guides and Grid. Here I have put my grid every 50px and created 10 subdivisions. You can change the grid on the fly if you need to fine tune it, but it is a good idea to stick with it! I have also unchecked "Grids in Back." I am going to create a coloured basic country and so this would cover the grid. By unchecking, the grid will be on top.
You can display the grid by going top View > Show Grid.
Now you have set up your grid, you can create your file - your map.
In Illustrator you can create a file with more than one artboard - I have one artboard for each continent, for instance. But since you can add art boards later, just start with one.
A quick bit of adding up is needed based on your grid. In the above preferences I have a major gridline every 50px - so for my purposes that is ten leagues. If I create an artboard 500 pixels wide, then that is 10 major gridlines and so 100 leagues. If I want the land 500 leagues wide, then that I will need the artboard 2500 pixels wide, plus some extra for a surrounding ocean.
Create the artboard the size you need and you are ready to start mapping!
Working with Layers
Layers are vital in drawing maps - they allow you to keep your map organised, change what is where depending on the timeline of your book and make it easier to work with.
In illustrator layers are a little like groups in photoshop as far as sorting out is concerned, and I create a layer for each major groups of elements. So, I will create one for the main background and then perhaps a layer for rivers and another for major mountain ranges, and then, perhaps, one for each of the countries, or areas of my map. This also allows groups of objects to be locked to make selecting and editing other objects easier.
The main background
Start by creating a layer called Background.
On the working map it is not really essential to create the sea, but if you want to, use the rectangle tool to create a box the full size of the artboard and give it a blue fill and no stroke. Make sure you have selected the background layer first. Now lock it.
Now create your basic map. I use the pencil tool for this.
This is probably the most critical part of your mapping. You need to think about your coastal communities, how big the land is, will you need deltas and all these sorts of details. I strongly suggest that you read up tutorials on how to create and edit shapes for your vector program.
Once you have the shape you need, give it a nice neutral fill color and lock it.
There you go, you now have your basic map and you can start working on the detail
Drawing borders, rivers and roads
Since this is your working map designed to help your plot, many of these elements you may well add as you write your book, but getting some of the key elements in place earlier will help you design you journeys and think about the abilities of your characters. For instance, a horse and cart will travel further and faster on a good road than over rough moorland. A navigable river allows the movement of much larger cargoes than a cart on a road, and so on.
All these elements are drawn with the pencil tool and the given weight and colour with a stroke - this is not using brushes as you would with Photoshop.
With rivers, always start with the destination, so probably the sea, and work towards the source. Choose the same colour as your sea for the stroke, choose a width and then select the thick to thin shape where is says Uniform. Your river will now get thinner as it travels inland! Trust me, this is so, so much easier than in photoshop where you have to mess around with brushes.
With roads and borders, if you want a dashed line, then click on "stroke" and follow the prompts in the box. Again, go look up some tutorials, but none of this is hard.
Mountains and Features
This is a working map, so do not try and draw everything!
Go and search for vector symbols you can download and use. Sorry, I cannot remember where I found mine, but there are a hell of a lot out there!
You can do the same for buildings, castles, anything you need.
Very quickly you will find a basic map coming together with as much or as little detail as you wish.

Next: Using Your Map for Planning »